
Your cart is empty.
Keep shoppingArduino Workshop 2018 | A step-by-step Arduino how-to guide
119,047 students
Arduino Workshop 2018 | A step-by-step Arduino how-to guide
Learn how to use Arduino, we'll teach you how to code and prototype with electronics.
Created byCore Electronics
Last updated 3/2018
English
English [Auto],
What you'll learn
- Understand what an Arduino is and how it works
- Learn how to use an Arduino safely
- Program your Arduino using code that you've written in the Arduino IDE (Integrated Development Environment)
- Learn programming concepts using C and C++ along with Arduino specific programming
- Understand best practice concepts for programming and prototyping
- Use a wide variety of hardware and components and prototype your projects using a breadboard
- Build your own innovative project with Arduino
Explore related topics
Course content
6 sections • 34 lectures • 4h 12m total length
- Introduction to Arduino0:45
Preface - all external content, code, images, etc can be found here (totally FREE):
https://core-electronics.com.au/tutorials/arduino-workshop-for-beginners.html
In this chapter you'll learn about:
- What is Arduino
- Different types of Arduino boards
- How does the Arduino Uno board work and why it's so popular
- What is a microcontroller
- How to use the Arduino IDE (Integrated Development Environment)
- Powering and connecting your Arduino to your computer
- Uploading programs to your Arduino board
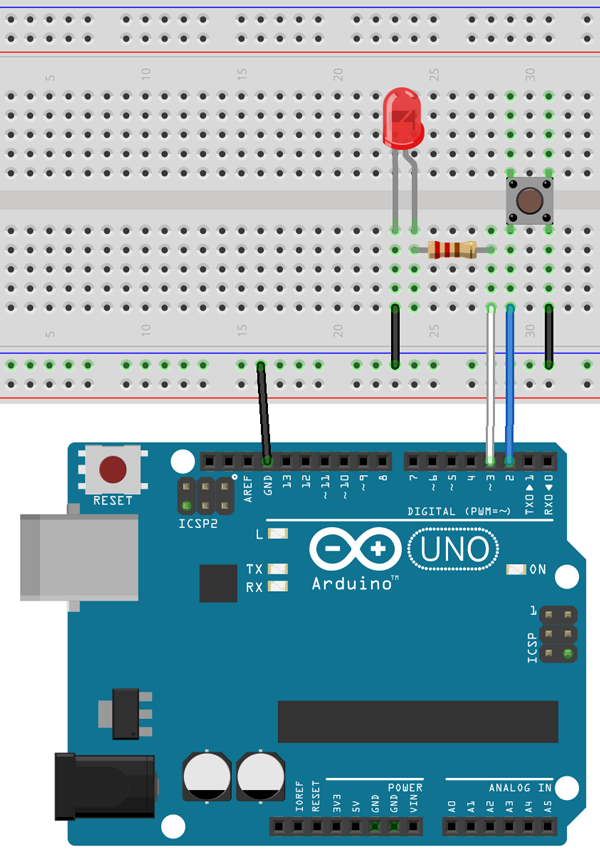
By the end of this chapter, you will have uploaded your first program to your Arduino board to control an LED
- What is Arduino2:16
In this section, we look at what is Arduino, what it's good for makers, and some of the different types of Arduino boards available.
- What is a Microcontroller3:42
In this section, we'll be looking at what is a microcontroller (the chip at the heart of any Arduino board), an overview of how they work, and how it integrates with the Arduino environment.
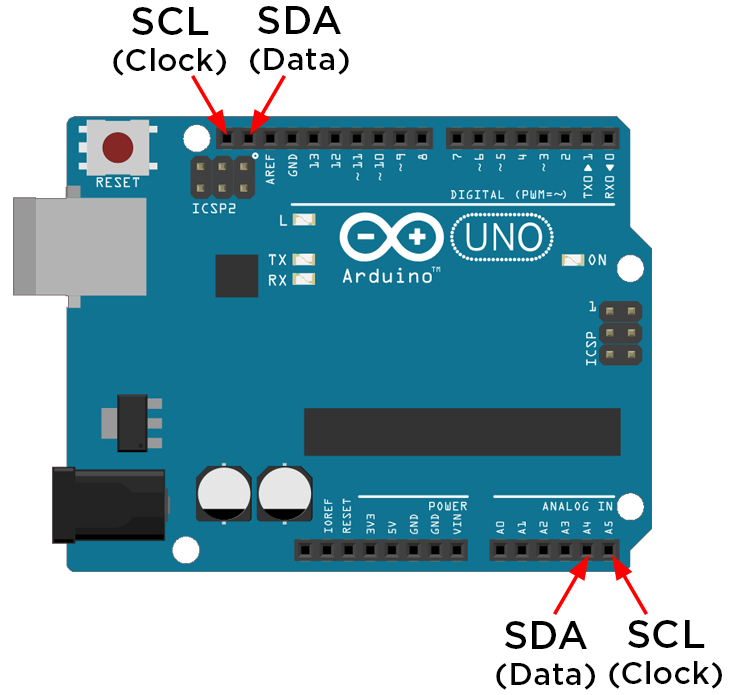
- The Arduino Uno1:10
In this section, you'll learn about the features and capabilities of the Arduino Uno board, how the layout of the board can affect your project, and why the Uno is such a great all-rounder.
- Arduino IDE and the Language1:41
In this section, we'll take a look at the Arduino IDE, which is where you write the code for your Arduino, upload it, and communicate with your board. We'll also cover the programming language that Arduino IDE uses, and where to download it.
Section Resources:
- You can download the Arduino IDE from the Arduino website.
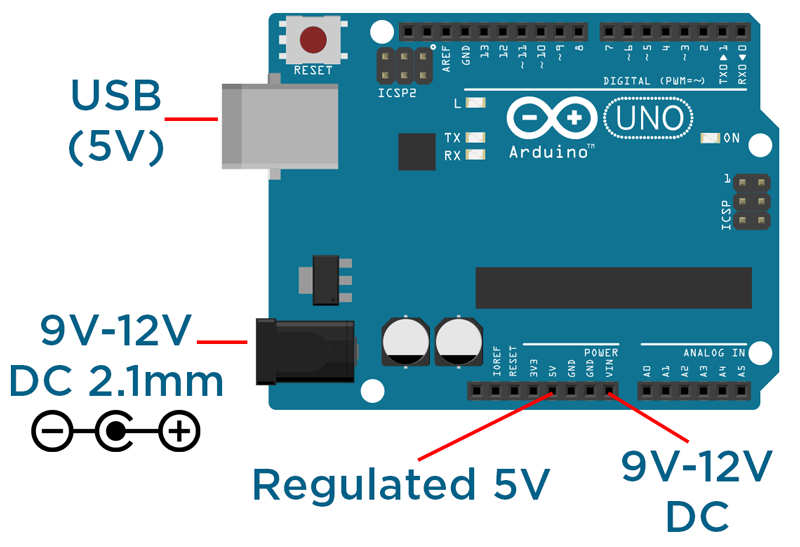
- Powering and Connecting Your Arduino0:56
In this section, you'll be learning about the various ways to power your Arduino, and how to connect it up to your computer for uploading your programs, and communicating to the computer using the serial port.
Section Resources:
Arduino Power Layout
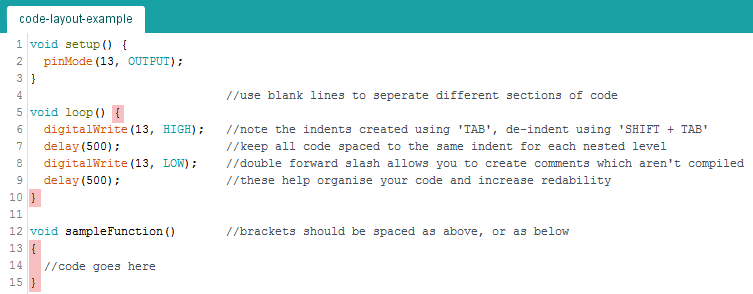
- "Hello World" Example4:49
In the final section of this chapter, we'll talk through using the Arduino IDE to upload your first program to your Arduino board.
Section Resources:
Source code for 'Hello World'
void setup() {
    pinMode(13, OUTPUT);       //setup pin 13 as an output
}

void loop() {
    digitalWrite(13, HIGH);    // turn the LED on (HIGH outputs 5V)
    delay(500);                 // wait for 500 milliseconds
    digitalWrite(13, LOW);     // turn the LED off (LOW outputs 0V)
    delay(500);                 // wait for 500 milliseconds
}
Requirements
- Have a passion to learn how to use Arduino as a Maker
Description
Arduino has become one of the pillars of the maker movement thanks to it's wonderful design and ease of use. With that said, learning to code and work with electronics can be a little intimidating. We're here to help! Our course will walk you through each step of the process and by the end you will be empowered with new skills, ready to build your own projects.
It's important to note that we're literally full time makers and educators, so expect quick answers, high engagement and a rewarding learning experience.
Who this course is for:
- Anyone whom would like to get started with digital electronics and build their own projects